

How To Crop As A Circle In Photoshop
How To Ingather Images In A Circle Shape Using Photoshop
Information technology'due south not super obvious how to crop images in a circle shape using Photoshop. There are a ton of ways to crop your photo to a smaller size, simply what about cropping it into a circumvolve? Whether you're needing it for a website, advertizing, or profile pic, in that location are a ton of reasons you may need to crop an image into a circular shape. At present the trouble is… how tin can you exercise information technology?
This mail will teach you how to crop images in a circle shape using Photoshop. I'll be sharing the best non-destructive way to crop your image while nonetheless being able to make adjustments to the ingather. Information technology doesn't matter what version of Photoshop you are using, you'll still accept the same tools available!
How To Crop Into A Circular Shape
Below outlines the stride-past-footstep procedure to cropping an paradigm in a circle shape using Photoshop.
#1. Import Your Image And Unlock The Layer
Import your prototype by clicking 'open up paradigm' when yous first open Photoshop.

Your prototype will appear as a locked layer in your layers console. To brand any adjustments, y'all demand to unlock it. This is hands done by clicking on the lock icon. Notice how your layer name changes from 'background' to 'layer 0'
#2. Select Your Elliptical Marquee Tool
The Elliptical Marquee Tool tin can be found underneath the Rectangular Marquee Tool at the top of your toolbar. To access it, click and concur on the Rectangular Marquee tool, and then drag your cursor over to the Elliptical Marquee Tool.

#3. Create A Circular Selection With The Elliptical Marquee Tool
With the Elliptical Marquee Tool selected, click and drag a round selection around the area of your photo you want to crop. If yous desire to brand the ingather a perfect circle, hold down your SHIFT key while creating the selection. If you want to movement the entire choice, press and hold the SPACEBAR to move it effectually.

If y'all are unhappy with your selection and desire to start all over, press Command or CONTROL + D to deselect the choice.
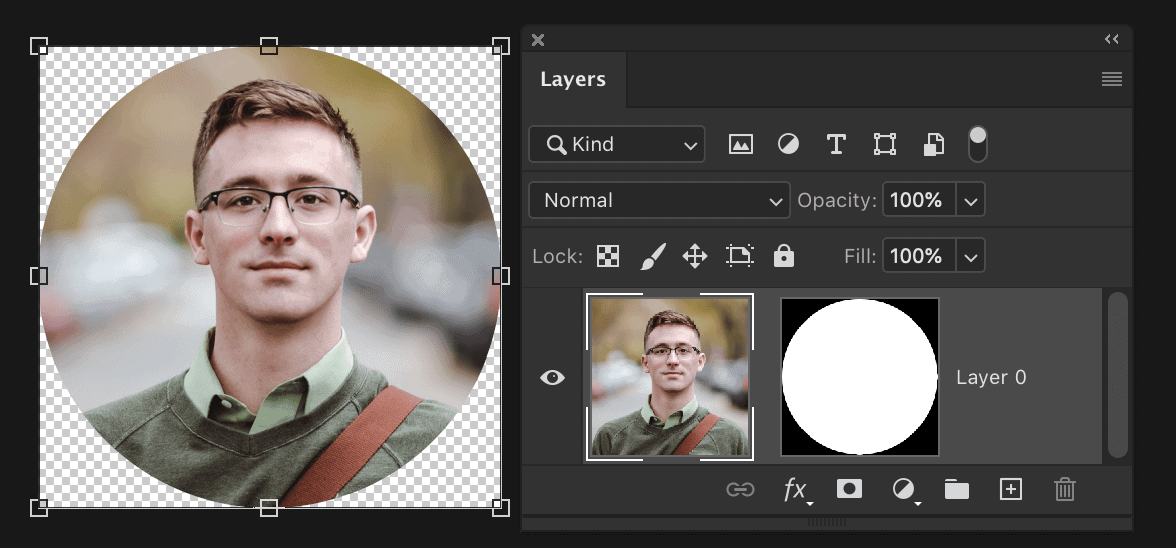
#4. Add The Circular Selection To A Layer Mask
Once you're happy with the position of your selection, add together a layer mask to your image by pressing the layer mask icon at the bottom of the Layers panel.
#5. Adjust The Prototype Position Equally Necessary
The dazzler of using a layer mask is that you tin make adjustments to the position of your circular crop at any fourth dimension! If you desire to adjust the position of your epitome within the circumvolve, first click the chainlink icon between your layer thumbnail and the layer mask. This allows you lot to adjust them individually from one another.
Adjacent click on your layer thumbnail and grad your motility tool by pressing V. At present yous can movement your paradigm independently from the round crop.
#six. Trim The Canvass To The Circular Crop
To get rid of the excess space on your canvas, go to Image > TRIM and a new dialogue box will open. Tick off 'Transparent Pixels' and brand sure all sides are selected. See below for an example.
At present you've successfully learned how to crop an prototype into a round shape using Photoshop! The side by side step is learning how to export this prototype out of Photoshop while maintaining a transparent background.
How To Export A Transparent Background In Photoshop
If you desire to make sure your epitome stays in a round crop, y'all need to consign your photo with a transparent background. Luckily this is really easy to exercise, and tin be done in just a few clicks!
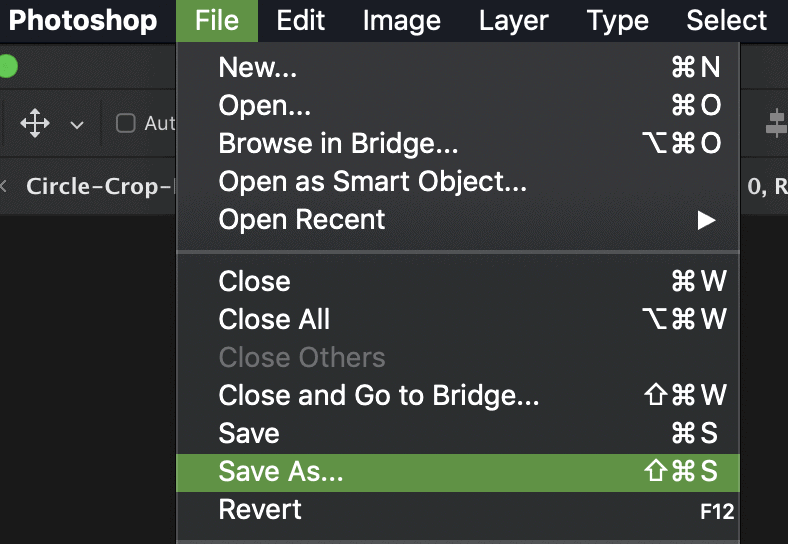
#i. Go To File > Save Every bit
One time you're happy with your round cropped image, go up to the menu bar and select FILE > SAVE As.
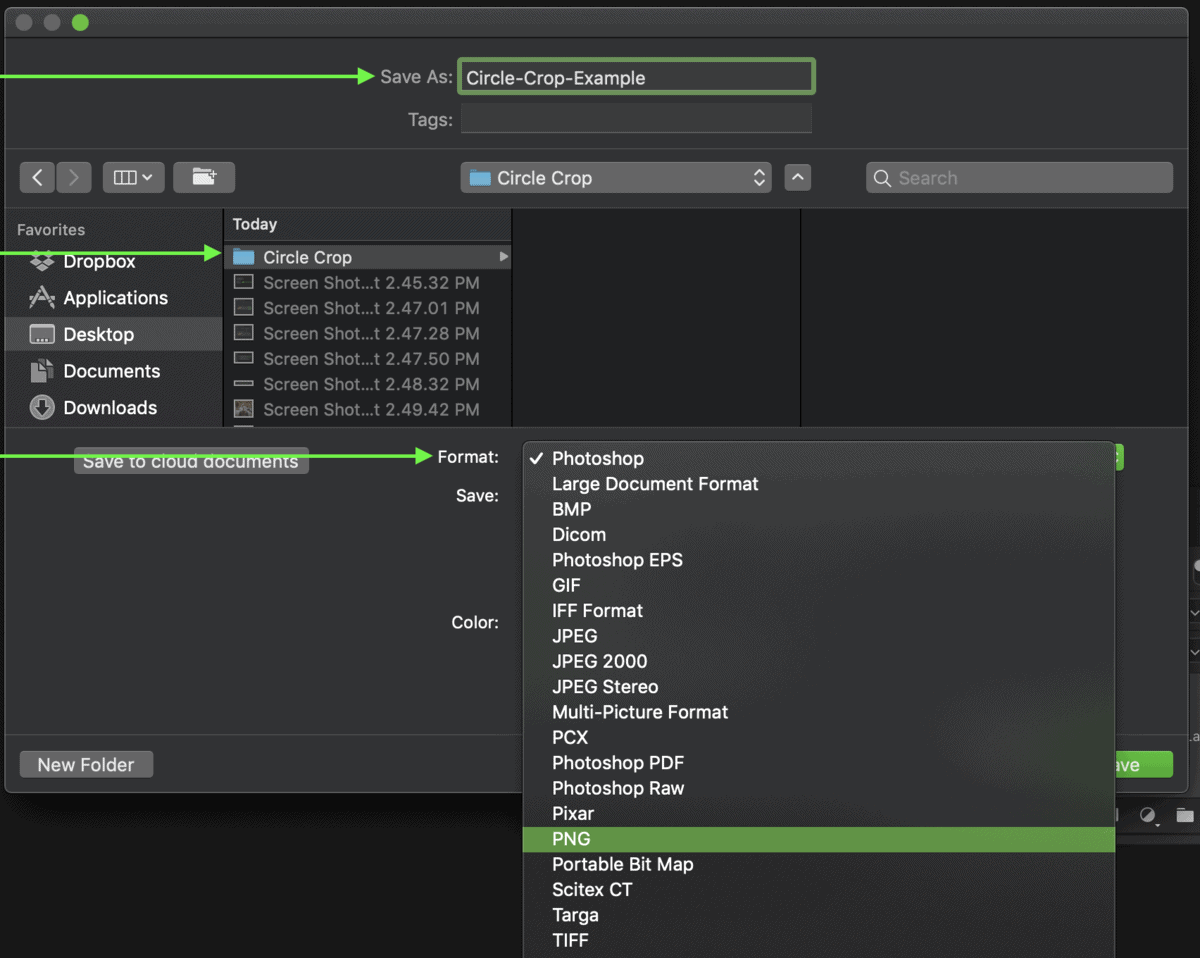
#2. Change Your Format To .PNG
Select your destination binder and rename your file to whatever you'd similar. Then change your format option to .PNG in order to consign your circular paradigm with a transparent background.
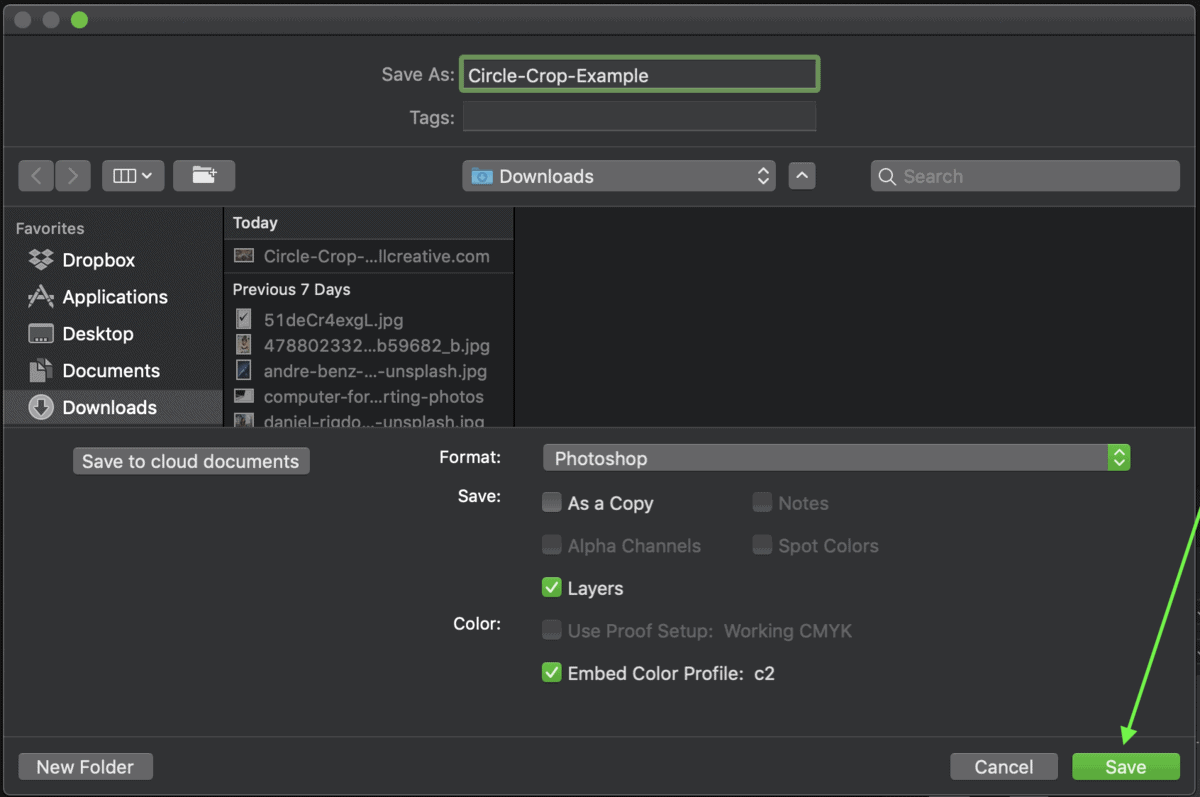
#3. Click Save
When everything looks good to go, hitting salvage to consign your epitome.
The Result

You've now successfully created and exported an image with a circular crop! Since information technology's a .png file, you can place it over top of any other photograph and it volition maintain its shape. In just a few easy steps, you've learned how to crop images in a circle shape using Photoshop!
More Photoshop Tutorials You May Like:
- Best means to remove any background in Photoshop
- How to alter color in Photoshop
- How to remove the groundwork from your logo
- 20 Photoshop hacks to improve your editing
If you know someone who needs to learn how to crop a photograph into a circumvolve, make certain to share this postal service with them!
Be sure to subscribe to my weekly newsletter for more than photography and photo editing tips delivered direct to your inbox!
Source: https://www.bwillcreative.com/how-to-crop-images-in-a-circle-shape-using-photoshop/
Posted by: casanovasland1994.blogspot.com
0 Response to "How To Crop As A Circle In Photoshop"
Post a Comment